
One great advantage of API Management is centralising auth concerns, thereby avoiding burdensome reimplementation issues and streamlining your security processes. The good news is that you can easily configure apiman to handle many common auth use-cases, such as OAuth2 with our popular Keycloak OAuth2 policy which I’ll outline in this blogpost.
Preparation
For this example, let’s assume we’re using apiman’s quickstart setup and have it running. I suggest using the 'Or simply try this…' box.
After you have your apiman quickstart running (replace apiman-1.2.0.Final in the path below with whatever version you downloaded), we can live deploy a handy echo service into our environment, so we have an API to test against:
cd /tmp
git clone https://github.com/apiman/apiman-quickstarts.git
cd apiman-quickstarts/echo-service
git checkout 1.2.0.Final
mvn clean install
mvn wildfly:deploy
Installing the Plugin
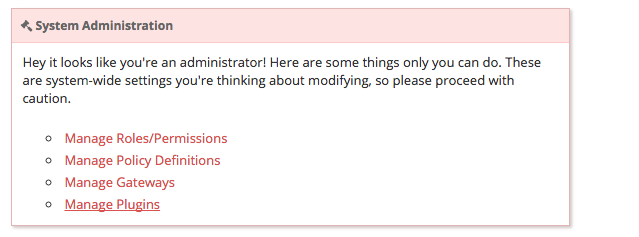
Those amongst you with some experience of apiman may have noticed that the OAuth2 policy doesn’t appear in the standard list of policies in the manager UI; that’s because the OAuth2 policy is an example of an apiman plugin, all of which are shipped separately from apiman, but are trivially easy to install.
When logged into the apiman manager UI as an administrator (for the quickstart that’s u:`admin`, p:`admin123!`), navigate to the manage plugins page:
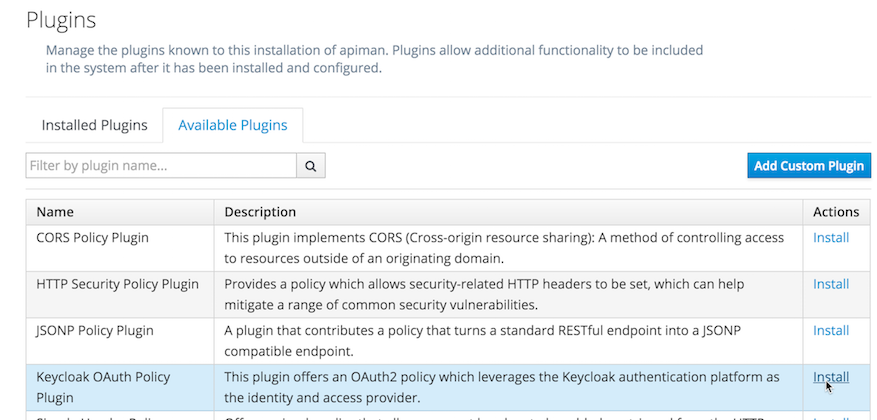
Tab to Available Plugins, select Install for Keycloak OAuth Policy Plugin, confirm the plugin coordinates, and click Add Plugin. That’s it!
Setting Up
There are two essential components to our system. First, is the Keycloak server, an all-in-one SSO and IdM platform; we’ll configure it to be our identity source and handle the issuance of OAuth2 bearer tokens. Second, is the apiman OAuth2 policy; we’ll set it up to validate the tokens precisely to our requirements.
Let’s assume we’re going to protect a very simple echo service, which echoes back to the requestor the details of any request made to it. It is located at http://localhost:8080/apiman-echo.
Keycloak Server
| There are a huge number of configuration permutations with Keycloak, and the most suitable approach will vary according to your requirements. It is highly recommended to consult the Keycloak guides to determine your optimal setup, as for the sake of brevity we’re only going to cover a couple of trivial preconfigured scenarios. |
First, log into the Keycloak server. If you’re following our walkthrough, the log-in details are identical to those mentioned earlier (admin, admin123!). You can see that there is already an apiman realm defined, but we’re going to create a new one, so navigate to Add Realm (top right), and import and upload this demonstration realm definition; it provides an extremely simple setup where we have:
-
A realm:
stottie -
A single user:
rincewind, with password:apimanand a realm role:echomeister -
And, a client:
apiman, which is allowed direct grants via Keycloak’s RESTful Direct Access Grants API.
Let’s quickly test requesting ourselves an OpenID Connect OAuth2 token:
curl -X POST http://127.0.0.1:8080/auth/realms/stottie/protocol/openid-connect/token -H "Content-Type: application/x-www-form-urlencoded" -d "username=rincewind" -d 'password=apiman' -d 'grant_type=password' -d 'client_id=apiman'This should return some JSON similar to the following:
{
    "access_token": "eyJhbGciOiJSUzI1NiJ9...<SNIP>",
    "expires_in": 300,
    "refresh_expires_in": 1800,
    "refresh_token": "eyJhbGcg...<SNIP>",
    "not-before-policy": 0,
    "session-state": "69974623-be8b-49d7-840a-0330c6bdde21"
}
Notice that the OAuth2 token we’re interested in is contained within the access_token field, with useful ancillary information about token validity and refreshing.
In this instance, the access token is a signed OpenID Connect JSON Web Token (JWT). Using the handy decoder available at jwt.io, we can see a lot interesting information, including the echomiester realm role defined on rincewind:
{
    "jti": "c89b8cf7-84ef-4f02-9954-f8d3d4321473",
    "exp": 1433414538,
    "nbf": 0,
    "iat": 1433414238,
    "iss": "http://127.0.0.1:8080/auth/realms/stottie",
    "aud": "apiman",
    "sub": "de4af322-85b2-4dbe-8d53-6a2ee29e4080",
    "azp": "apiman",
    "session_state": "69974623-be8b-49d7-840a-0330c6bdde21",
    "client_session": "b5bd36a0-d576-4593-be7b-4648612c25b8",
    "allowed-origins": [],
    "realm_access": {
        "roles": [
            "echomeister"
        ]
    },
    "resource_access": {
        "account": {
            "roles": [
                "view-profile",
                "manage-account"
            ]
        }
    },
    "name": "",
    "preferred_username": "rincewind"
}
This demonstrates one OpenID Connect’s most useful attributes: all the information required to validate a request is contained within the token itself.
Apiman OAuth2 Policy
First, log into apiman, and Create a New Organization; let’s call it Newcastle. Select the APIs tab, and add a New API; we’ll name this one EchoAPI and then Create API.
Select the Implementation tab, and set the endpoint to our echo service, http://localhost:8080/apiman-echo. Save and move onto the Plans tab, where you should opt to Make this API public. After saving, we can move onto the Policies tab, where the interesting stuff starts.
Navigate to Add Policy, and select Keycloak OAuth Policy from the drop-down list. A substantial set of options are available for your perusal, but for the purposes of this blog demo we’ll set the following:
| Option | Value | Details |
|---|---|---|
Realm | The path to our realm [1]. Note that in older versions of Keycloak (pre | |
Keycloak Realm Certificate | Base64 encoded cert | Paste your Keycloak realm certificate. |
Forward Authorization Roles | Forward Realm Roles, and set Forward Realm Roles? to true | If we decide to use the authorization policy later, we’ll forward the realm roles contained within the token (i.e. |
Forward Keycloak Token Information | Header: | Set header |
Select Add Policy, and then Publish the API. You can see its endpoint information in the Endpoint tab, it should be similar to:
Testing Authentication
Let’s test our setup with cURL to see whether our request is denied if we don’t use a token:
[msavy@mmbp tmp]$ curl -k  https://127.0.0.1:8443/apiman-gateway/Newcastle/EchoAPI/1.0
{
    "type": "Authentication",
    "failureCode": 11005,
    "responseCode": 401,
    "message": "OAuth2 'Authorization' header or 'access_token' query parameter must be provided.",
    "headers": {}
}
Excellent, it all seems to be working! Notice that we’re using self-signed certificates for this demo, so the -k flag will skip certificate validation.
Next, let’s do a request with a token. There are two ways to attach your bearer token to a request. Either:
-
Authorizationheader, asAuthorization: Bearer <token> -
access_tokenquery parameter, astoken
First, let’s retrieve a fresh token from Keycloak, and extract the access_token field from the json using jq [2].
curl -X POST http://127.0.0.1:8080/auth/realms/stottie/protocol/openid-connect/token -H "Content-Type: application/x-www-form-urlencoded" -d 'username=rincewind' -d 'password=apiman' -d 'grant_type=password' -d 'client_id=apiman' | jq -r '.access_token'Second, we’ll take the token and attach it to our request to the API
[msavy@mmbp tmp]$ curl -k -H "Authorization: Bearer eyJhbGciOiJSUzI1NiJ9.eyJqdGkiOiJiNDY1YW..." https://127.0.0.1:8443/apiman-gateway/Newcastle/EchoAPI/1.0
{
  "method" : "GET",
  "resource" : "/apiman-echo",
  "uri" : "/apiman-echo",
  "headers" : {
    "Authorization" : "Bearer eyJhbGciOiJSUzI1NiJ9.eyJqdGkiOiJiNDY1YWMzNi1hMTczLTRjOWMtYWJjZS00MzE2MJ...",
    "Host" : "127.0.0.1:8080",
    "User-Agent" : "curl/7.37.1",
    "Accept" : "*/*",
    "Connection" : "keep-alive",
    "Cache-Control" : "no-cache",
    "Pragma" : "no-cache",
    "X-AZP": "apiman"
  },
  "bodyLength" : null,
  "bodySha1" : null,
  "counter" : 1
}
Great, it worked! We can see EchoAPI has now been reached, meaning our OAuth2 token was validated successfully, and it sent us back a response which includes the bearer token we used (you can strip this out in the options).
Furthermore, you can see our X-AZP header has been set to the expected value of apiman, which was pulled from the token.
If you’re feeling lazy, here’s an all-in-one script to do it for you.
Adding Authorization
We’re going to develop our example a little bit further. At present, we simply have a binary approach where we either allow or disallow based upon which realm the token was issued from. If we want a more granular approach where we can discriminate upon roles, then we need to add another element: Authorization.
The more observant readers will note that we have already added two of the required elements when we imported the realm into Keycloak; namely, a user rincewind and a realm role echomeister.
If we navigate back to the EchoAPI API in the apiman UI, we can create a New Version. We’ll call it 2.0 and clone the previous configuration. Moving over to the Policies tab again, we Add Policy and select Authorization Policy from the drop-down.
We’re going to add two rules:
| To access resource | using verb/action | the user must have role |
|---|---|---|
|
| echomeister |
|
| overlord |
Our example user has the first role, but not the second. Add the policy and Publish the API again. Our endpoint will now reflect the changed version.
You will probably need to issue a new bearer token, which you can achieve by repeating the previous shell command.
[msavy@mmbp tmp]$ curl -k -H "Authorization: Bearer eyJhbGciOiJSUzI1NiJ9.eyJqdGkiOiJmODAyZjFmMy1kN2JmLTQ0YjQtODA2N..." \
 https://127.0.0.1:8443/apiman-gateway/Newcastle/EchoAPI/2.0/rincewind/wizard
{
  "method" : "GET",
  "resource" : "/apiman-echo/rincewind/wizard",
  "uri" : "/apiman-echo/rincewind/wizard",
  "headers" : {
    "Authorization" : "Bearer eyJhbGciOiJSUzI1NiJ9.eyJqdGkiOiJmODAyZjFmMy1kN2JmLTQ0YjQtODA2N...",
    "Host" : "127.0.0.1:8080",
    "User-Agent" : "curl/7.37.1",
    "Accept" : "*/*",
    "Connection" : "keep-alive",
    "Cache-Control" : "no-cache",
    "Pragma" : "no-cache",
    "X-AZP": "apiman"
  },
  "bodyLength" : null,
  "bodySha1" : null,
  "counter" : 19
}
As our user rincewind has the role echomeister, his request went through successfully.
However, if we try to access a resource for which he doesn’t hold the appropriate role, we see an error message:
[msavy@mmbp tmp]$ curl -k -H "Authorization: Bearer eyJhbGciOiJSUzI1NiJ9.eyJqdGkiOiJmODAyZjFmMy1kN2JmLTQ0YjQtODA2N..." \
 https://127.0.0.1:8443/apiman-gateway/Newcastle/EchoAPI/2.0/secret/not/allowed

{
    "type": "Authorization",
    "failureCode": 10009,
    "responseCode": 0,
    "message": "The user is not authorized to make this request (a required role is missing).",
    "headers": {}
}
In Conclusion…
We protected an API with apiman using OAuth2; with examples of both simple authentication and role-based authorization. It should be easy to design your own role-based auth setups in combination with Keycloak.
iss field
jq to select the access_token field in our JSON, so if you don’t have jq installed you can use your package manager to get it: OS X Brew brew install jq; On Fedora sudo yum install jq; On Debian sudo apt-get install jq