
This article aims to provide a short guide on how to get API Management capabilities provided by apiman to work with JBoss Fuse, a lightweight, flexible, integration platform that is based on Apache Camel, an implementation of many of the most commonly used enterprise integration patterns (EIP).
Creating API provider in JBoss Fuse
The following few steps should quickly get you started with deploying applications into JBoss Fuse. For demonstration purposes I’m using a sample REST application (quickstart) shipped along with Fuse installation. For more information about developing applications for JBoss Fuse inspect the developer materials and other resources at jboss.org.
Installation
To obtain a distribution of JBoss Fuse please visit the JBoss Fuse download page. Installation of JBoss Fuse is very simple, as the only thing you need to do is to unzip the distribution, e.g.
unzip jboss-fuse-full-6.2.0.redhat-133.zipYou might also want to enable the default admin user by uncommenting the last line in <fuse_dir>/etc/users.properties. Without a user configured you won’t be able to log into Fuse management console.
Server startup
To start Fuse simply execute the following command from <fuse_dir>/bin:
./fuseOnce JBoss Fuse is loaded proceed by creating a new Fuse Fabric instance. To do that execute fabric:create command from Fuse CLI:
JBossFuse:karaf@root> fabric:createAfter Fuse Fabric is up and running, log into Hawt.io management console, it should be by default available at http://localhost:8181. In Fabric perspective, under Containers tabs click on the Create button to open the Create New Container form.
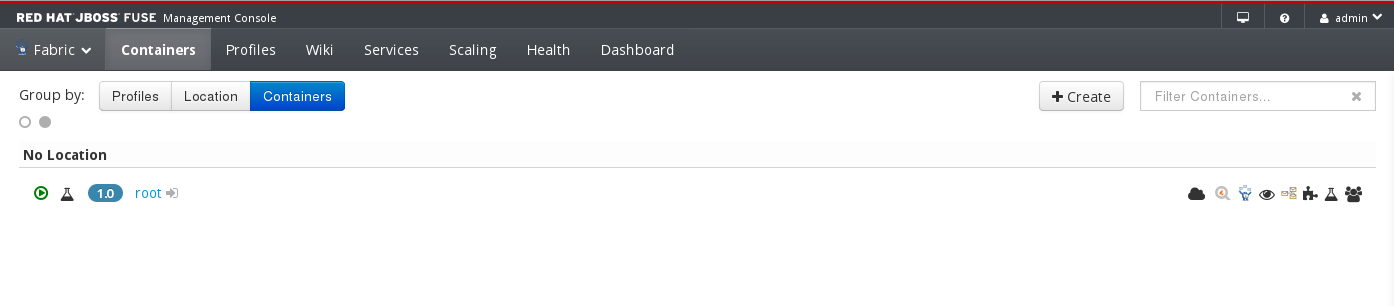
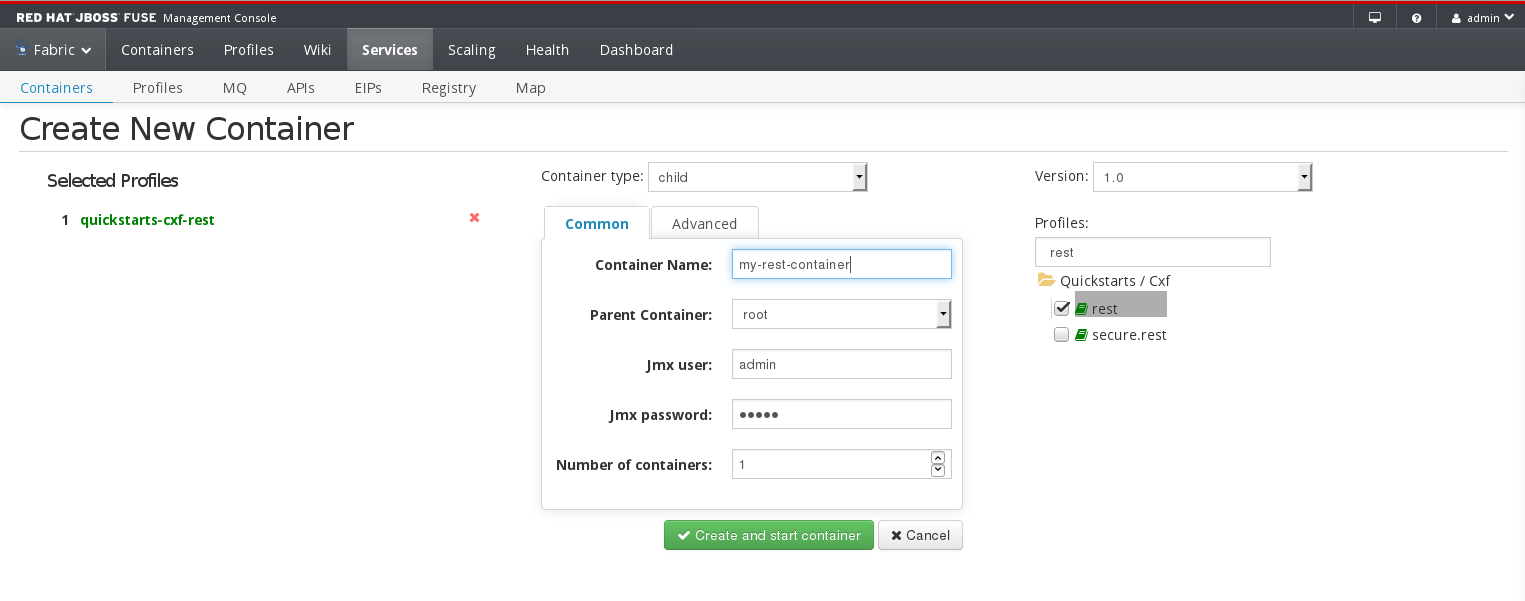
On the Create New Container page fill in the name you wish to use for your container (e.g. my-rest-container) and be sure to select the 'rest' profile for it. This will ensure that Fabric pickups the REST Quickstart and deploys it to this container. Finish the operation by hitting the Create and start container button.
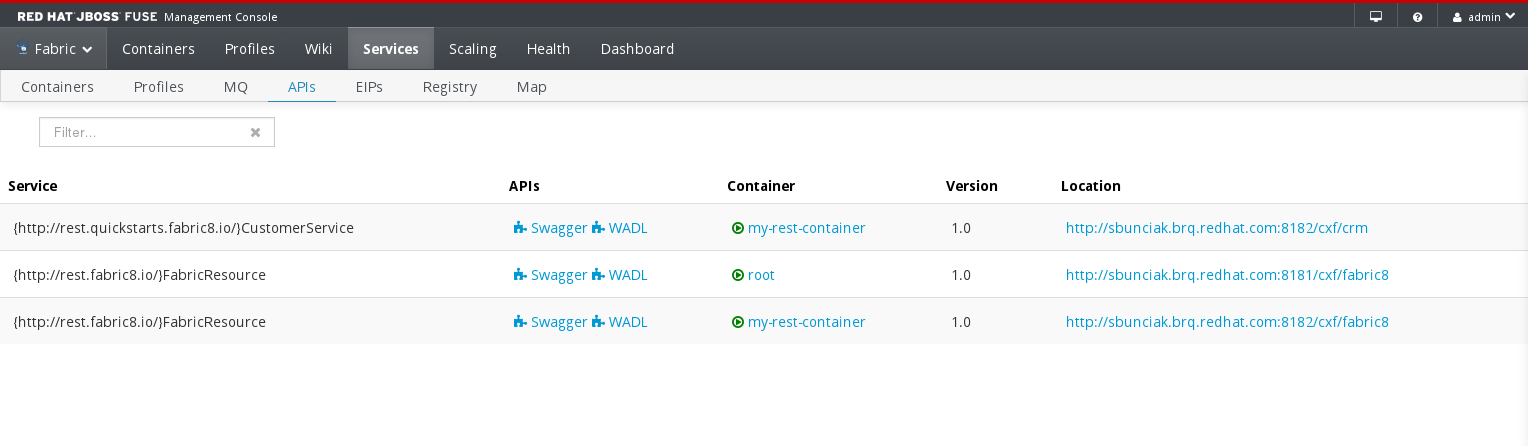
The container should start automatically right after it has been created and the REST endpoint should become available. If not, select the appropriate container and hit Start. You can inspect all the APIs deployed to your Fuse Fabric instance by clicking on APIs section under the APIs tab. Note the Location field - that’s the base url the for endpoint implementation. We will use it later in the apiman manager.
There is a default user preconfigured so you can verify if the application was successfully deployed. It’s available at <location>/customerservice/customers/123 (e.g. http://localhost:8182/cxf/crm/customerservice/customers/123)
[sbunciak@sbunciak ~]$ http http://localhost:8182/cxf/crm/customerservice/customers/123
HTTP/1.1 200 OK
Content-Type: application/xml
Date: Tue, 07 Jul 2015 22:17:13 GMT
Server: Jetty(8.1.17.v20150415)
Transfer-Encoding: chunked

<?xml version="1.0" encoding="UTF-8" standalone="yes"?>
<ns0:Customer xmlns:ns0="http://rest.fabric.quickstarts.fabric8.io/">
    <ns0:id>123</ns0:id>
    <ns0:name>John</ns0:name>
</ns0:Customer>
Configure apiman to manage Fuse endpoint
To install the latest version of apiman follow this guide. The installation process is again very simple, all you need to do is to extract the apiman overlay zip on top of Wildly 8 server.
After completing the installation, start apiman by executing the following command from <wildfly>/bin folder:
./standalone.sh -c standalone-apiman.xmlQuick public API setup
For demonstration purposes I’ll be creating a Public API, however in real life you might want to configure different plans, various contracts, etc. Please consult the apiman user guide for more details.
In order to manage APIs in apiman you need to create a new Organization to which your APIs will belong. You can do that easily in apiman manager, typically available at: http://localhost:8080/apimanui.
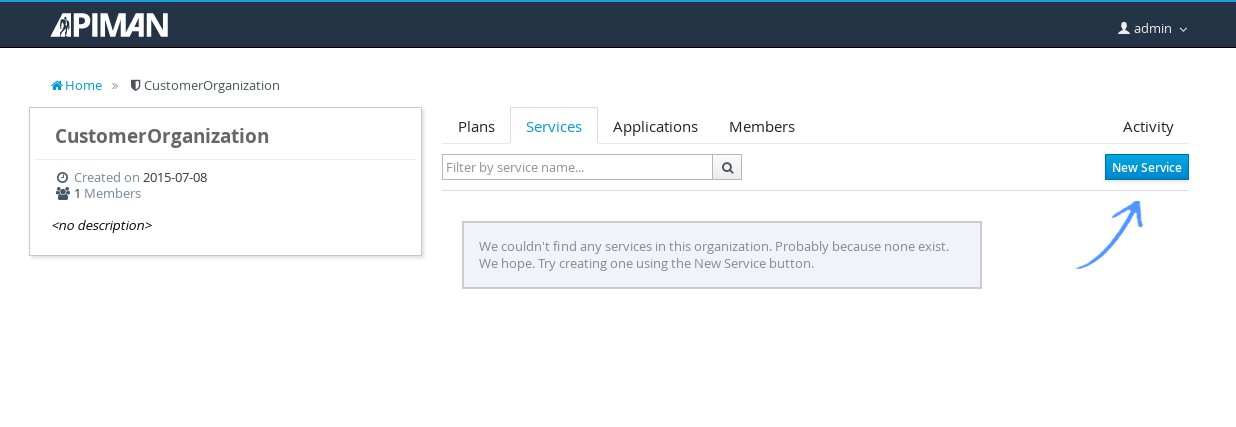
Once logged into the apiman manager, locate the Organizations sections on the initial page, select Create a New Organization link, provide a name and hit Create Organization button. This will take you to organization details page where you can create a new API by clicking on New API button under APIs tab:
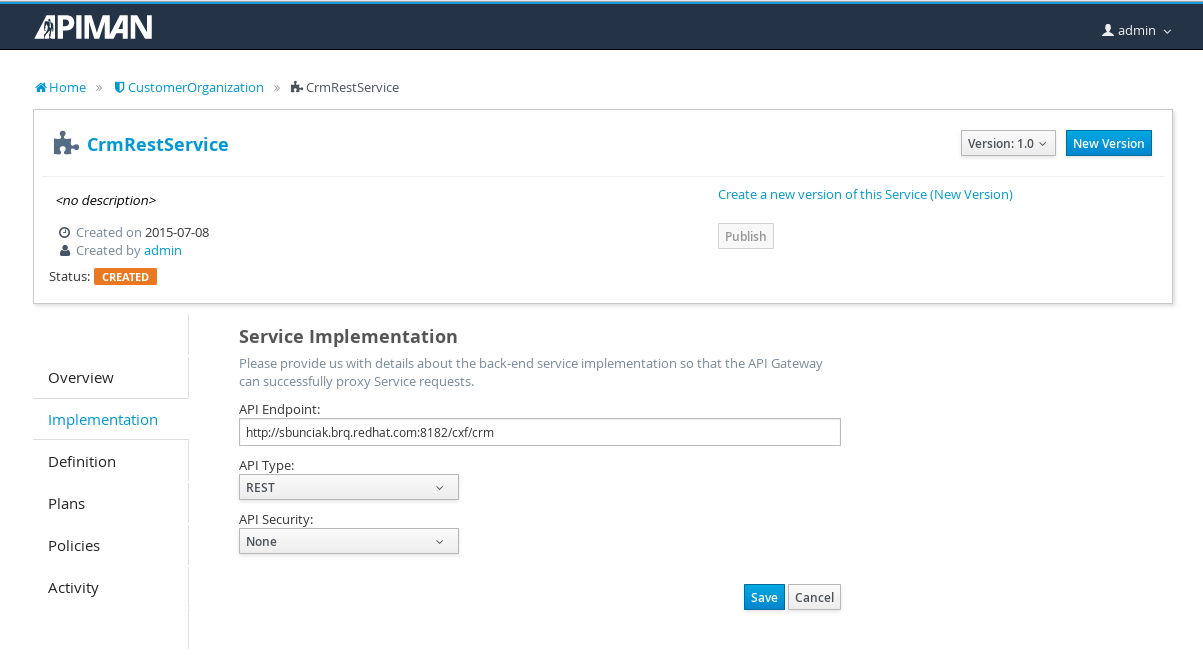
You will be asked to provide a name and a version for this API. Once the API is successfully created there are few things remaining before you can publish and start using it. First, you need to provide an implementation base url on the Implementation tab. Use the base URL of the REST Quickstart and save your changes:
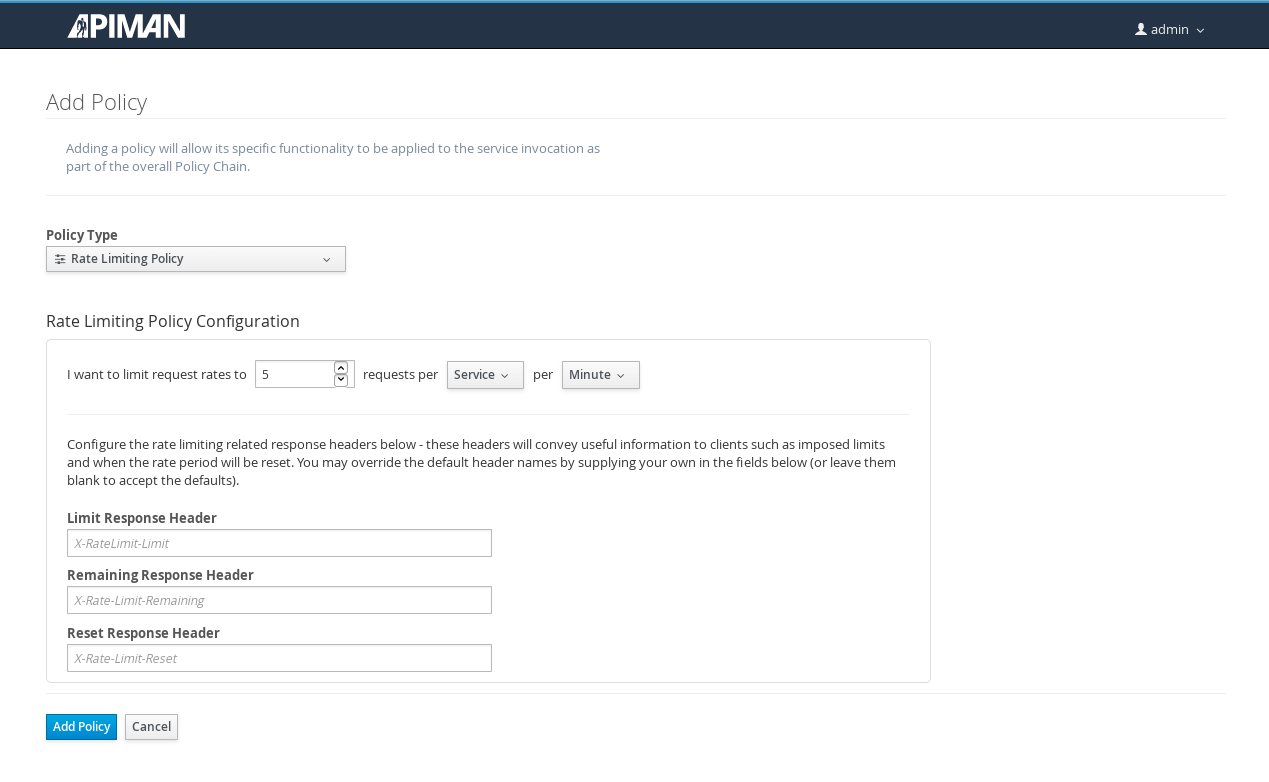
Second, you may want to apply some policies to this Public API. To do that, go to the Policies tab and configure a policy of your choice. I used the Rate Limiting policy to limit usage of this API to 5 per minute:
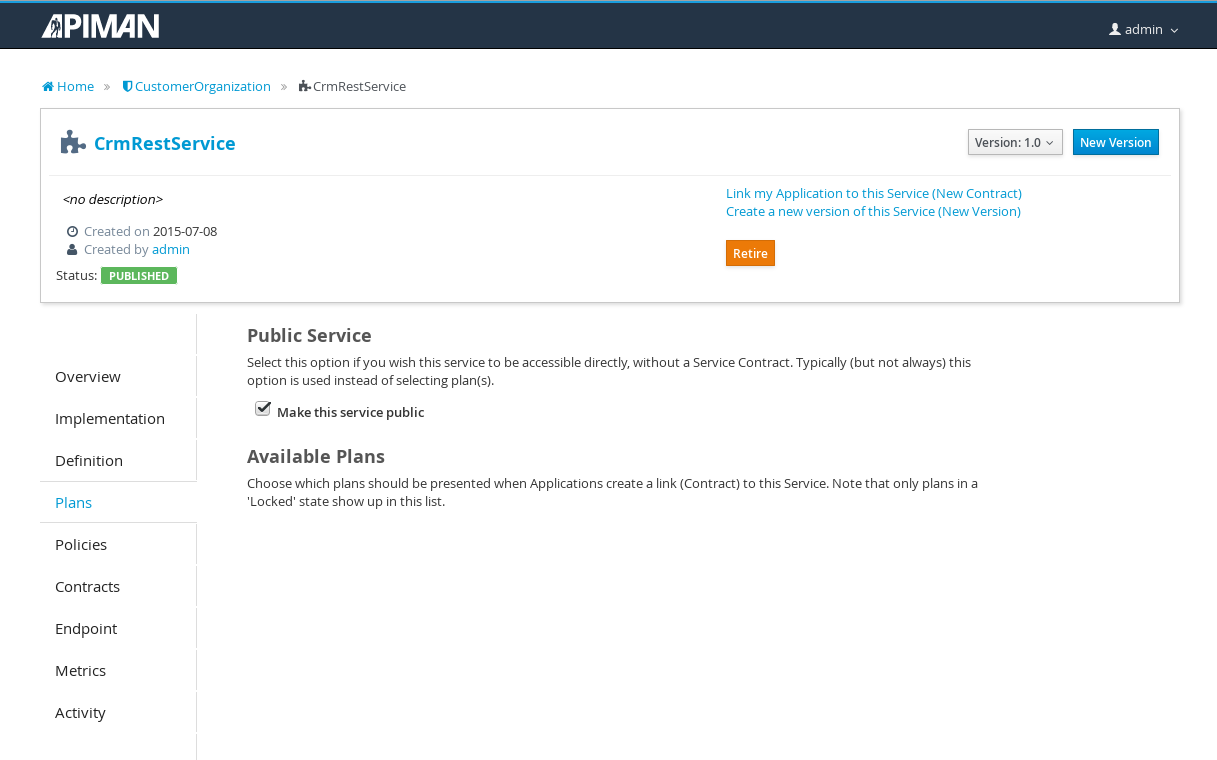
Now you are all set to make the API public by checking Make this API public under Plans tab, saving the changes and clicking the Publish button (which should be now enabled).
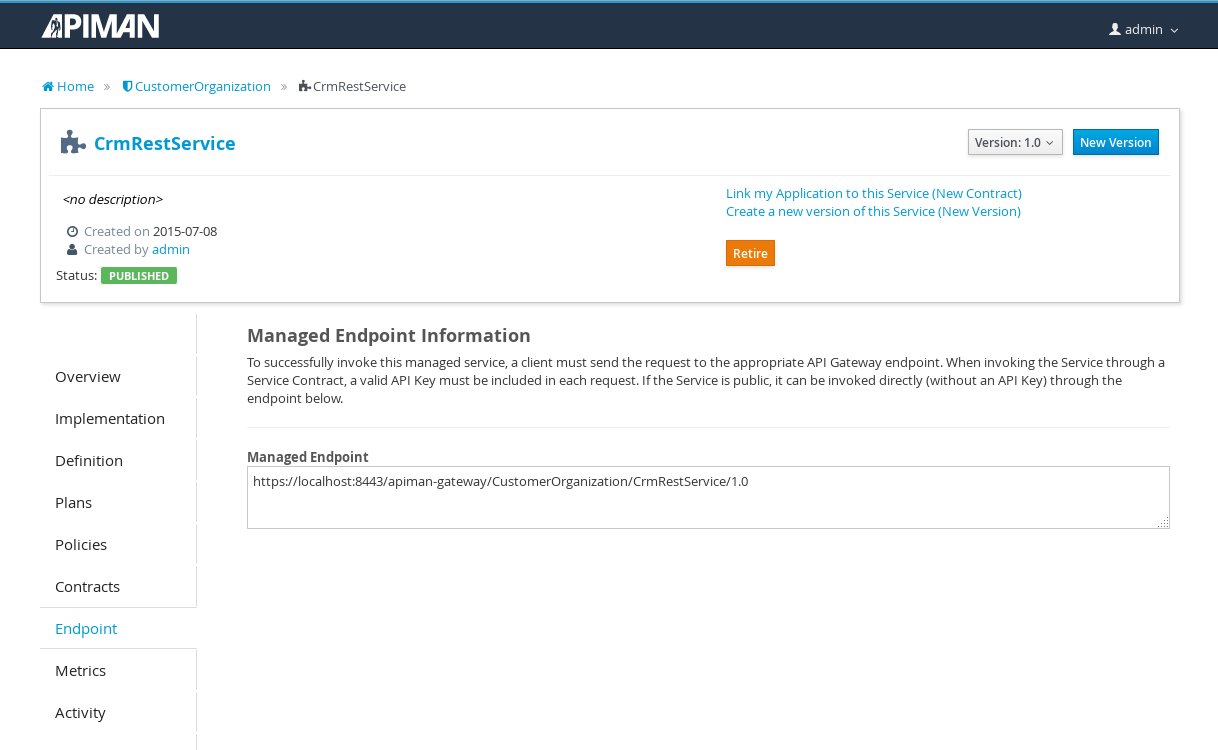
After you have published the API, have a look at the Endpoint tab to look up the URL to be used to invoke this public API:
Testing your setup
Depending on which policy you assinged to the Public API you might experience different behavior. However, if you followed the tutorial and assigned the Rate Limiting policy after reaching the maximum number of allowed requests you will get an output similar to:
-
First request should succeed:
[sbunciak@sbunciak ~]$ http https://localhost:8443/apiman-gateway/CustomerOrganization/CrmRestApi/1.0/customerservice/customers/123 --verify=no
HTTP/1.1 200 OK
Connection: keep-alive
Content-Type: application/xml
Date: Tue, 07 Jul 2015 21:01:02 GMT
Server: Jetty(8.1.17.v20150415)
Transfer-Encoding: chunked
X-Powered-By: Undertow/1
X-RateLimit-Limit: 5
X-RateLimit-Remaining: 4
X-RateLimit-Reset: 57

<?xml version="1.0" encoding="UTF-8" standalone="yes"?>
<ns0:Customer xmlns:ns0="http://rest.fabric.quickstarts.fabric8.io/">
    <ns0:id>123</ns0:id>
    <ns0:name>John</ns0:name>
</ns0:Customer>-
Executing 5 consecutive requests should fail with
HTTP 429 Too Many Requests:
[sbunciak@sbunciak ~]$ http https://localhost:8443/apiman-gateway/CustomerOrganization/CrmRestApi/1.0/customerservice/customers/123 --verify=no
HTTP/1.1 429 Too Many Requests
Connection: keep-alive
Content-Length: 176
Content-Type: application/json
Date: Tue, 07 Jul 2015 21:00:51 GMT
Server: WildFly/8
X-Policy-Failure-Code: 10005
X-Policy-Failure-Message: Rate limit exceeded.
X-Policy-Failure-Type: Other
X-Powered-By: Undertow/1
X-RateLimit-Limit: 5
X-RateLimit-Remaining: 0
X-RateLimit-Reset: 8

{
    "failureCode": 10005,
    "headers": {
        "X-RateLimit-Limit": "5",
        "X-RateLimit-Remaining": "0",
        "X-RateLimit-Reset": "8"
    },
    "message": "Rate limit exceeded.",
    "responseCode": 429,
    "type": "Other"
}