
Quite a bit, actually. :)
I want to talk about how Authorization currently works in apiman, because it’s a little more loosely coupled than you might expect. Note that at some point in the future we’re going to be renovating how policies are defined and configured in the API Manager UI. But until then, you can refer to this blog post for an overview of how to configure Authorization!
I won’t bury the lead - the key to getting Authorization to work is understanding that it only works together with Authentication. First you must add and configure a compatible Authentication policy, which will be responsible for extracting the user’s roles and passing them along to the Authorization policy.
Define your terms, sir!
Let’s make sure we’re on the same page with respect to terminology, shall we?
-
Authentication: the act of validating that a user is who she claims to be, by checking provided credentials against some source of identity. Examples include BASIC Authentication and OAuth2.
-
Authorization: the act of ensuring that the authenticated user has permission to perform the requested action or view the requested data. Typically, involves checking that the user possesses one or more required roles.
How does this work in apiman?
I’m glad you asked. In apiman we have split these two functions out into separate policies. This allows us to use the same Authorization policy regardless of what type of Authentication is being used.
Basically you need to do the following two things:
-
Add and configure an Authentication policy such as the BASIC Authentication Policy or the Keycloak OAuth2 Authentication Policy
-
Add and configure an Authorization Policy.
That’s it in a nutshell!
Give me more details!
OK, OK. If you’re reading this you probably know the apiman basics - how to create Organizations and APIs and whatnot. If not, I would recommend you check out the User Guide or the Tutorials.
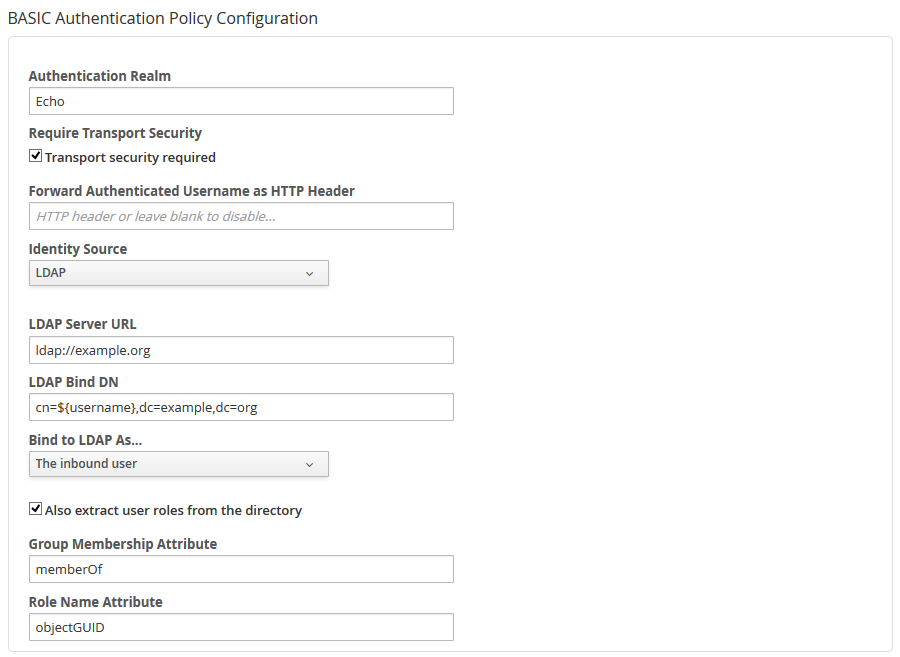
Once you have an API that you want to configure, go ahead and add a new policy. Choose, for example, the BASIC Authentication Policy and configure it as seen in the following screenshot:
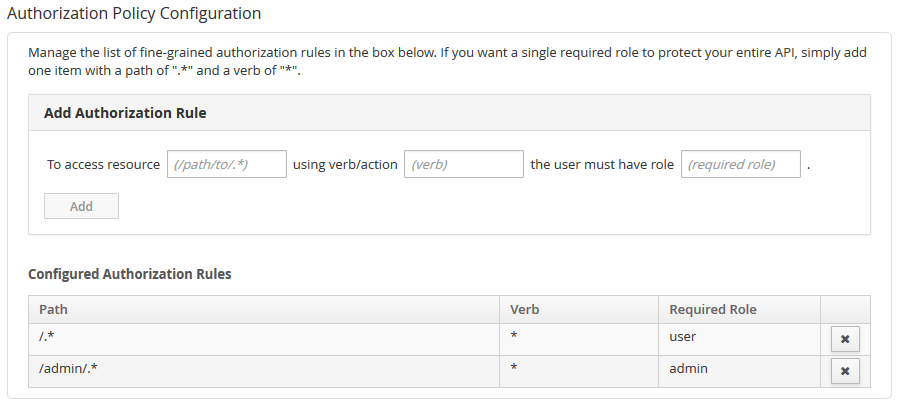
Once you’ve added that policy, you can add the Authorization Policy - make sure they are in the proper order, since the Authentication policy must execute first. Configure the Authorization Policy however you like, using roles appropriate for your users. For example, it might look like this:
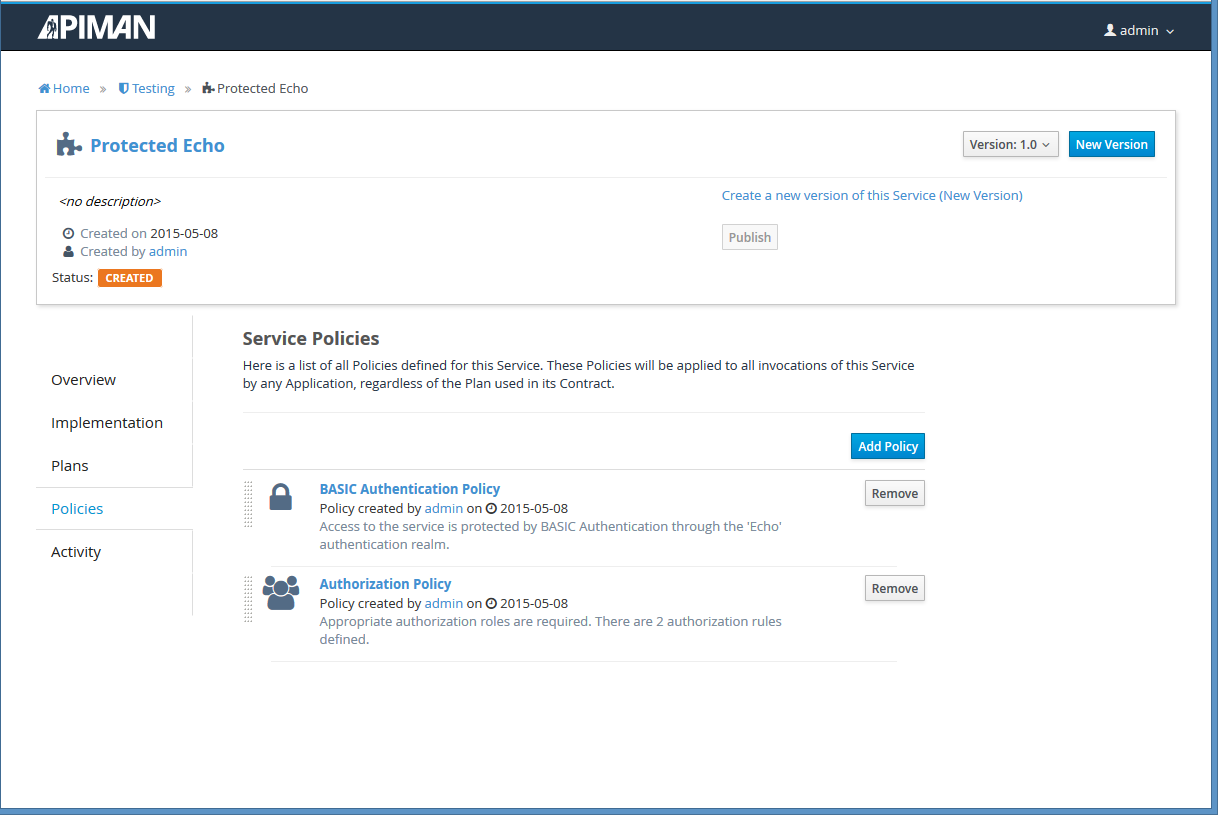
Once all is said and done, you should have two (at least) policies configured for your API. It might look something like this in the UI:
If you follow those steps, everything should work out alright for you! The Authorization Policy is capable of being quite fine-grained. You can configure role based access via custom resource location regular expressions and HTTP verb(s). If all you want is a globally required role to access your API, that’s easy too:
-
Resource Path:
/.* -
Verb/action:
* -
Required Role:
<your-role>
Good luck and come find us on the mailing list or IRC if you have any trouble!
/post